Wednesday, April 9, 2014

Tina Purse Sew a Long Day 4

Welcome back!  Let's add our 2 handles to the Tina Purse.

Find your strap loop pieces and thread them through the loops at the end of your straps, wrong sides together, and pin to the purse body as directed.
Notice that the strap is right side down as shown above.  That way, it will be right side up when you hold the purse!  Sew the loop straps onto the body of the purse.  I like to sew back and forth to really hold the strap on tight, this is a seam that will be working hard!  The loop straps are plenty long, you can sew them on a little shorter if you like, notice mine extend a bit beyond the raw edge of the top of the purse.  Trim away any excess.  Repeat on the other side of the purse.

(note:  If you are making a single handle version of the Tina Purse, follow the instructions in the pattern and attach the handle a little later in the construction)

Now lets work on the lining and zipper.

Find the lining pieces.  Sew each of the 4 darts (2 on each lining side) to create the bottom contour of the purse.  Press the darts.
Now lets work on the zipper.

If your zipper is 18" long, we will cover the end of the zipper with a decorative stop.  You can trim away any excess zipper tape.  If you were unable to find an 18" zipper and your zipper is longer, close the zipper and cut the end of the zipper so it is 18" long.

Let's create the zipper stop.  Cut a square from one of your fabrics 2" x 3".  Press under 1/2" on each end so the piece is now 2" x 2".
Wow, none of my fabrics like to hold a crease!

Following pg 17 of the pattern, fold the square right sides together and stitch the sides to make the zipper stop the right size.
Trim away the excess fabric from the seams and turn right side out.  Place the end of the zipper into the fabric box.  If there is still a stop on your zipper (or even if your zipper is separating), make sure the stop/ends are encased in the fabric.  Trim away extra tape if you need to.
If using a poly zipper like mine, stitch around all 4 sides of the fabric box.  If you are using a zipper with metal teeth, sew up to, but not through the teeth (can you say - broken needle!).  Backstitch at the beginning and end to secure your stitching!
Find your zipper facing pieces.  If you have used a firm but thin interfacing like decor bond, you can press it under with the outside facing pieces.  If you used a fleece or bulky interfacing, you might want to trim away 1/2" from each end before pressing under to reduce the bulk.  I like to line up my 4 facing pieces to make sure when the ends are pressed under the pieces are all the same length.
Sew the first side of the zipper onto the outside (here the blue print) facing piece as directed on Pg 19 of the directions.  Remember to turn under the extra zipper tape at the start of the facing.
Your zipper will be a few inches longer than the facing pieces, that is correct!  You want the extra zipper so you can open the purse more fully when unzipped.

Add the facing lining piece to the seam you just sewed and stitch across the zipper again as directed.
Press the facing pieces away from the zipper and topstitch around 3 sides as directed.  Repeat on the second side of the zipper and now your zipper should look like this:
Let's attach the zipper to the lining.

Find your lining piece.  Place the lining piece right side up, lay the zipper on top of the lining piece with the lining facing down.  The lining piece should be a couple inches longer than the zipper facing, that's correct as the zipper will 'float' in the center of the purse.  I eyeballed the center, but you can use a tape measure to check the center if you wish!
Place the top facing piece right side down on top of the zipper facing and pin all layers together. 
If the ends do not match up exactly, that's ok.  Depending on your fabrics, your accuracy in cutting, their relative weights and the interfacing you choose will all affect the final dimensions of the pieces.  The lining will float inside the purse, so this seam is not a crucial dimension!  Sew the seam.

Following the pattern directions, repeat this seam on the other side of the zipper/lining.  Your lining should now look like this.
 Come back tomorrow and we'll finish making the Tina Purse!


Tuesday, April 8, 2014

Tina Purse Sew a Long Day 3

Let's get stitching!

Thread up your machine with a matching thread color.

Get your four side purse pieces and lets sew up the side seam.  Remember if you are using faux leather, you don't want to use pins to hold the pieces together to sew.  Binder clips work great for stabilizing your pieces without damaging the fabric.  My sample is not a fabric that is damaged by pins, so I'm doing it the old fashioned way! 
Sew the two side seams.  I have selected Fusible Fleece for my side pieces.  Since the fabric is not prone to excessive fraying, I'm going to trim my seam allowance close to the stitching (rather than clipping the curve)
to remove extra bulk. The top piece is trimmed.
 Press the seam.  I pressed from the inside first.
Then I laid the pieces right side out flat and pressed from the top since this fabric does not like to hold a press!


Now cut the fabric band out (as directed).   I like to use a quilt ruler to cut out squares and rectangle.  Its fast, easy and you will get nice 90 degree corners!
Turn under the raw edges on the long sides and stitch.  My fabric has a knit backing, so I only turned it under once.  If your fabric might fray or get 'thready', you might want to turn it twice, or serge or zig zag the raw edge before turning under.
Following the pattern directions, thread your rings onto the fabric band so it looks like this:
Now we will add the rings/band to the center front of the purse.  Your band will be a little longer than the width of the purse front piece.  Because different weights of fabric draw up differently, you might have a lot of extra fabric.  That's ok, we will trim away the excess.
Spread the fabric band so it looks nice on your bag.  You want the upper edge about 1" down from the top of the center front piece.  Ease in the fullness with a couple of pleats.  If you are feeling fussy about it, you could gather the fabric with a running stitch, but I just pinned in a couple of pleats where I wanted them.  Baste the piece in place and trim away the excess band.
Those rings are heavy!  Take a few basting stitches through the ribbon behind the rings to attach it to the center front piece.  This will keep the rings from drooping when the purse is done!

Sew the front pieces together at the bottom seam and press open.
Now lets sew the sides to the center of the purse.

Begin by matching up the bottom seam you just sewed to the side seam of the side pieces.  Working out from there, pin the pieces together all the way to the top of the bag.  Match the points and the upper edges of the bag pieces.
 Sew the seam you just pinned and repeat on the other side.  Turn the purse right side out to see how it looks!  Give those seams a press.


Find your strap loop fabric pieces.  There should be 2 of them cut with your pattern.  In order to keep these pieces from adding too much bulk to the upper seam of the purse, the strap loops are made a little differently than the strap.  As directed in the pattern, turn the raw edges to the center of the strips and topstitch to hold the fabric in place.  I sewed mine from the back side.  You can sew from either side.  Since my fabric wouldn't hold a press, by sewing from the back I could see that the edges match up so the width is consistent. 
Cut each one in half so you have 4 pieces.  Here are the finished loop straps from the right side..
If you have purchased ready made straps, you are done for today, come back tomorrow!

For this sew a long, I am making 2 straps.  At first I was going to make the straps from the lining fabric, but once I got the bag to this stage, I didn't like the way the lining looked for the straps (even though it would be easier to work with!).  After experimenting with the side bag fabric I determined that it would make nice straps, even though it would not hold a press very well.

If you are making straps, cut 2 pieces of fabric 3 1/2" by 30" long.  You can make your straps longer or shorter if you like, this is just the length I like!

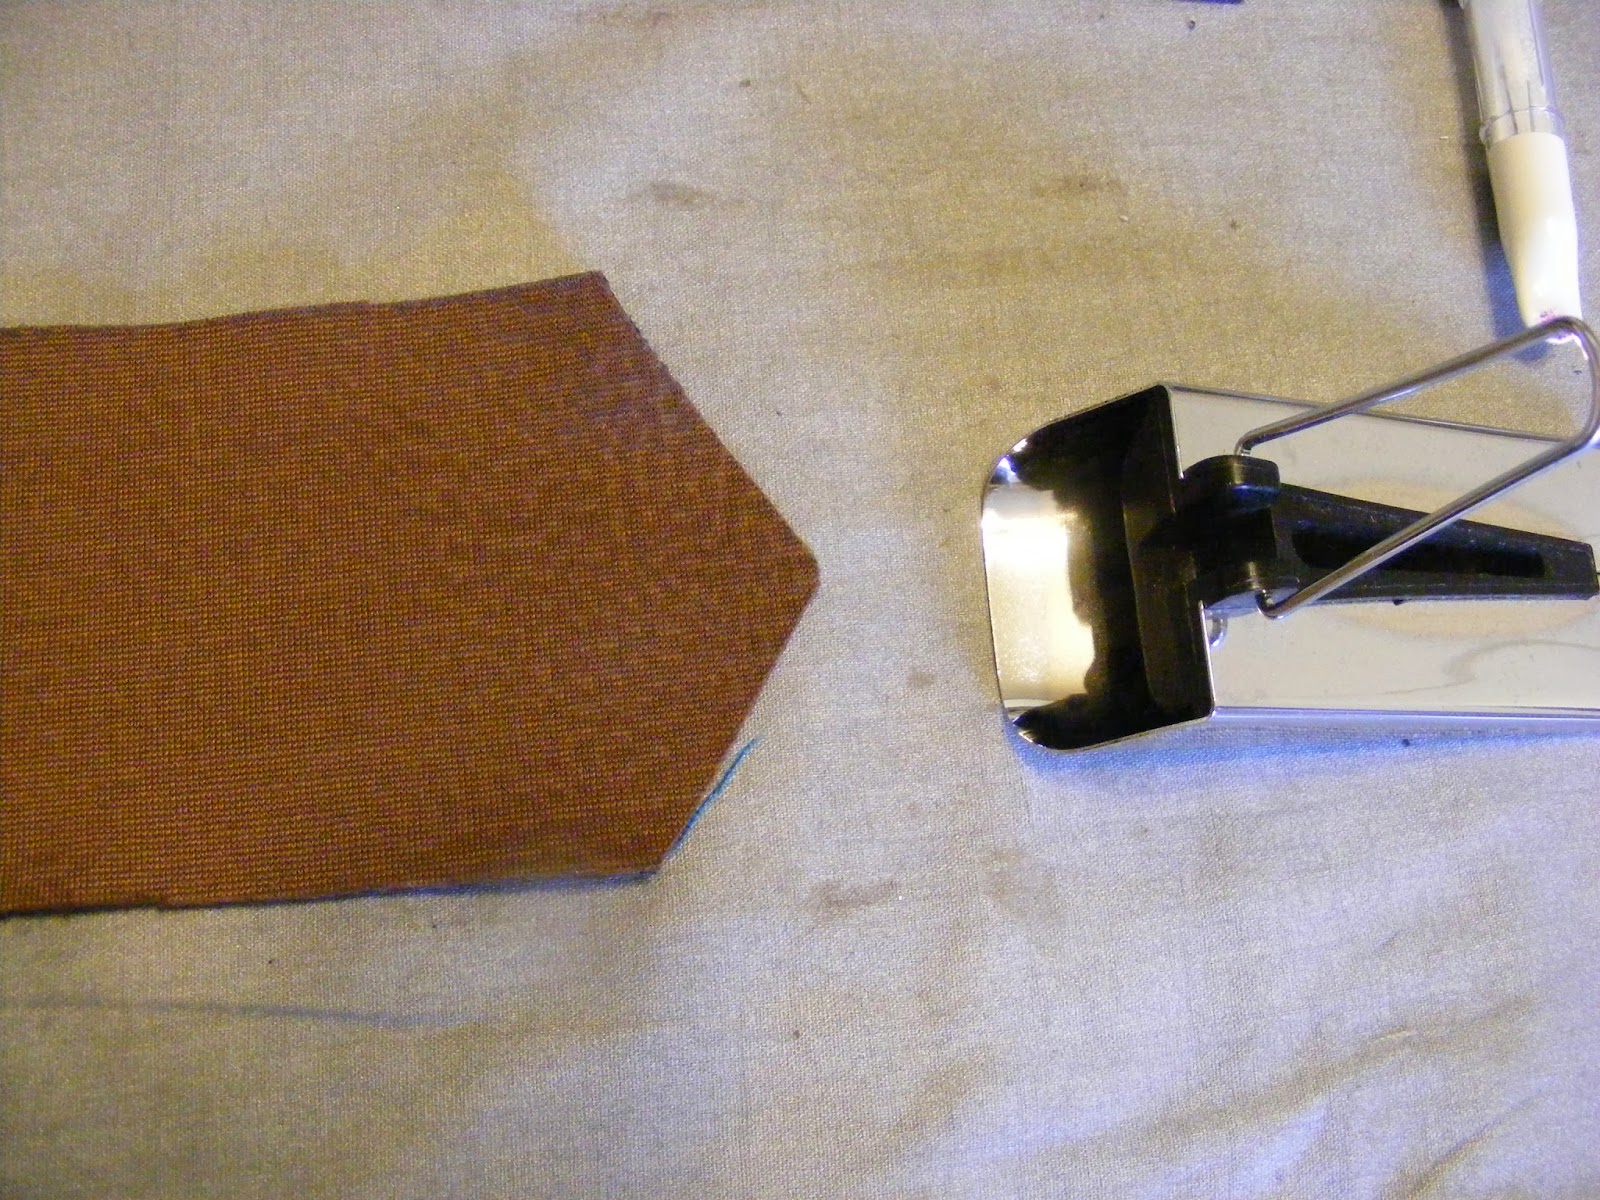
I hope you have a bias tape maker, it's such a useful tool!  Thread the fabric strip through your bias tape maker and press the strip.  Follow the pattern directions to turn under the ends.  Because my fabric is very thick and knit, I decided to not turn under the ends - too much bulk!  To get the fabric started through the bias tape maker, I cut a point in the end of the strip.
 My fabric was not creasing tightly, but the iron gave it enough of a crease to guide the strip along while stitching.  Take your strip and stitch the open side.  You may find that the strap twists a little when you stitch the first side. 
If this happens, don't panic!!   When you stitch the other (fold) side, start at the same end you did for the open side and top stitch the length of the strap.  It should lay flat after the second side is stitched.
Nice and flat now!
I cut the ends of my straps straight across.  As I mentioned earlier, this fabric was quite bulky and since it is a knit backing, fraying was not going to be an issue.  I did not turn under the ends of the straps.

Find the rings for the ends of the straps.  Loop the strap through the ring and stitch to close. The square with a box in the center makes a really strong attachment.  As I mentioned earlier, my fabric is really bulky, so I sewed just a box and cut the ends cleanly without turning under the fabric.
Fold up about 1 1/2" - 2" on each strap.  Make sure you have a right side for each strap when you sew the ring on the second end of the strap.  You want the turned up piece on each end to be on the same side of the strap!  Your straps now should look like this.

Good progress today!  Come back tomorrow for more stitching fun.


Monday, April 7, 2014

Tina Purse Sew a Long Day 2

Tina Purse Sew a Long
Day 2

Lets get started on our purse!

Print out your pattern pieces and assemble the pieces that are colored.  This includes the purse center, the purse sides, and the purse lining.

Cut out your purse pieces.  Notice the grain line on the purse side pieces.  Use this guideline to have an upright appearance to the pattern when the purse is assembled.
I found this cool fabric that looks like a textured suede on the face and is on a fairly stable knit backing.  It is easier to sew on than some faux suede fabrics, but because it is a knit backing, its a little thick.  I still plan to use interfacing because it is still soft on its own.

I am going to cut my purse center pieces sideways (see the selvedge at the top of the picture) because I like this direction of the print.  It looks like 'up' to me!

Continue until you have cut out all your purse pieces as directed.

Now lets cut out the interfacing.

I like to use my fabric as a pattern, especially for pieces that had to be cut on the fold.  My interfacing is folded in half, right sides together.  The side pieces are not symmetrical so you must be sure to have 2 left sides and 2 right sides when you are all done.  I put the side pieces where they fit best to have less waste.  Since interfacing doesn't have a woven grain, you can cut in either direction and do not have to line up the grain line.  You can cut at an angle too!

Here are all my pieces cut and ready to go!
Now get your iron fired up and lets fuse the interfacing to the fabric pieces.
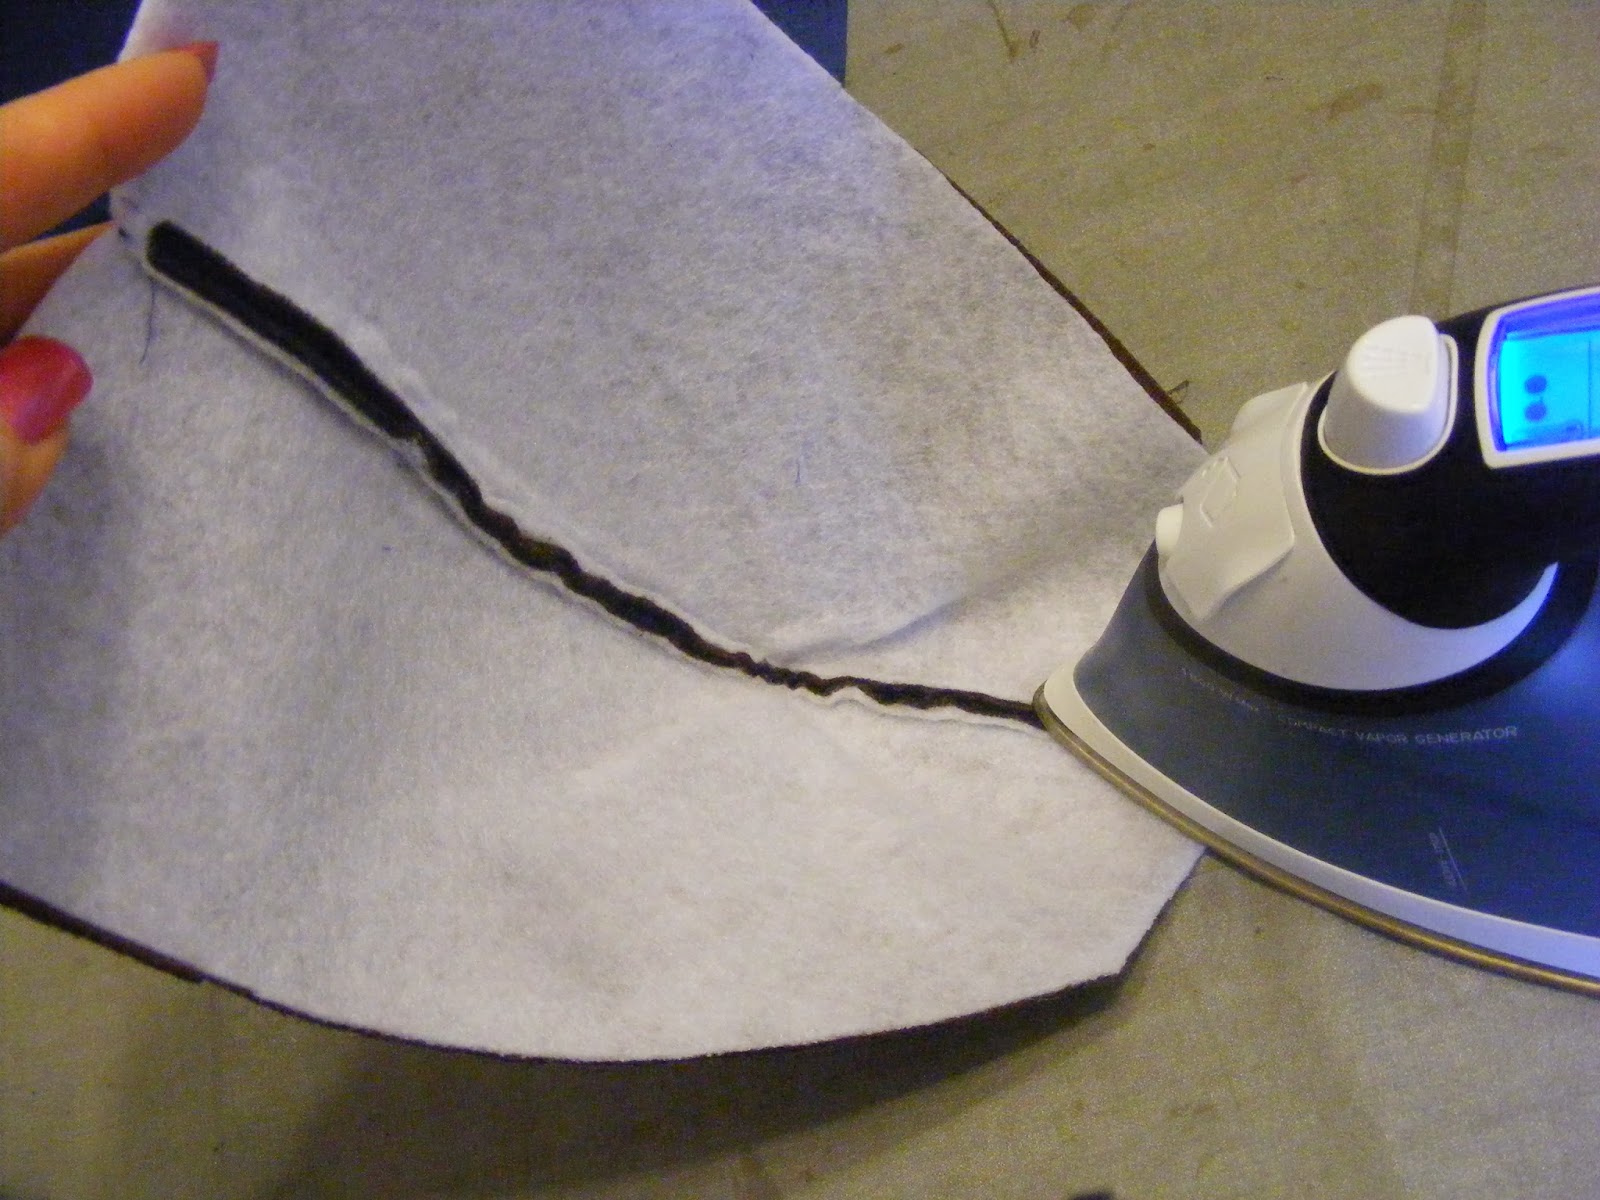
Sometimes the interfacing is a little bigger than the fabric piece, oops!  When this happens, I just trim away the excess interfacing.
Now we have everything ready to assemble.  Come back tomorrow ready to sew!

Questions?  Comment below!


Thursday, April 3, 2014

Tina Purse Sew a Long Day 1

Tina Purse Sew a Long
Day 1

Now you should have your Tina Purse Pattern, if not, order and download from Etsy or Craftsy today!

Let's talk about fabric selection!

Main Purse Fabrics:

When choosing fabric there are several things to keep in mind.
1. Your sewing skill level.  If you are a beginner or don't sew very often so are a bit rusty, choose fabrics that will be easy to sew with!  Fabrics that are very heavy or faux leathers or suedes might make your life difficult and your project frustrating.  Light to medium weight woven fabrics will be stable and easy to sew and once you have made the pattern you can decide if you are up for some more challenging fabrics.  Sew often?  Experienced?  Have fun, find some of the embroidered, textured or faux suedes or leathers and combine them for a fab bag.

2.  How do I mix prints successfully?  Mixing patterns is great, but to keep it looking pretty and not too crazy there is a trick.  Choose patterns that change in scale (size of the print).  If using 2 prints, choose one that is a large scale, and a second print in similar colors in a small scale.  If using 3, chose a large, medium and small print.  See how nicely these fabrics work together, colors are related, the smaller print on the left doesn't compete with the larger print on the right.


3.  What about interfacing?  To make any fabric an appropriate weight for a purse, you should consider interfacing.  I have been experimenting with many types of heavyweight interfacing and have liked every one I've tried, all for different reasons!  The pattern instructions give detailed guidelines for selection.  Much of it is personal preference in how you want your finished purse to look.  Do you want it soft and slouchy or firm and smooth?  Even quilt weight cotton can be firmed up nicely with a good stiff interfacing!  Your goal is to make all your fabrics similar in structure so if one fabric is heavy and another is light, use heavy interfacing on the light fabric to 'equalize' the weights of fabrics you are combining.  If using highly structured interfacing in purse body (like Pellon 71F) make the facings/zipper facings a little less stiff with a standard heavyweight interfacing.

4.  Purchase handles or make your own?  Sometimes I find a great set of pre-made handles that really match up with the fabrics I am using, sometimes nothing works.  If there aren't any pre-made handles that match, you can make your own pretty easily.  Getting a 2" bias tape maker will make the handle quick, easy and very consistent in appearance.  Faux leathers and suedes are very hard to make handles from, choose a nice coordinating fabric or buy a little extra from one of your body fabrics (see pattern instructions for yardage).

5.  Zipper.  The easiest zippers to work with are the poly coil zippers.  You can stitch over them without any trouble.  A metal zipper is fine and the pattern will give you suggestions on working with metal zippers.  If you can't find the exact size, buy a longer zipper.  We will make a zipper stop that will finish off the end, you can cut a longer zipper down to size.

6. Yardage.  The suggested yardage in the pattern assumes that you are not trying to place a large pattern in a particular place on the purse.  I like to take the main pattern pieces to the fabric store in case I select a fabric where I need to cut the center or sides in a particular place in the fabric.  If you choose a fabric like this one, you might need a little extra fabric.
7. Rings.  I'm sure you will check the obvious places for rings, purse hardware section at the fabric or craft store, or the jewelry section might have them.  I've found lovely rings in several sizes at the Hardware store, so check there too.

Now head off to the fabric store and gather your supplies.  We'll begin cutting Monday!

Questions or comments?  Please message below!

Friday, March 28, 2014

Tina Purse Sew-a-Long Schedule

I hope you will join me for the Tina Purse Sew-a-Long beginning Thursday April 3rd!


If you have already purchased your pattern, but haven't gotten started, here is your incentive to get it stitched up.  If not, get your pattern and join us on Thursday 4/3 to sew together.  The Sew-a-Long will be an interactive opportunity to make the Tina Purse and have a chance to ask questions, share ideas, and get extra tips beyond the pattern instructions.  I won't be republishing the instructions, but hope to give you additional tips and techniques to sew your purse.

I will be demonstrating View C, but you can make any version and still sew a long with the group.

Here is the planned schedule:


Thursday April 3rd :  Fabric and interfacing selection notes – buy fabric and supplies on the weekend!
Monday April 7th:   Assemble pattern pieces, cut out and fuse interfacing.
Tuesday April 8th:  Sew decorative rings, outer purse body and straps (if you are making your own)
Wednesday April 9th:  Attach handles, create zipper and place into the lining.
Thursday April 10th:   Complete assembling the lining and finish the purse.

If you aren't a follower, sign up to follow this blog for quick links and reminders for each day's Sew-a-long.

Saturday, August 24, 2013

All about Gaila Designs Patterns

Everything you ever wanted to know...but were afraid to ask is now answered on Chris W Designs' Blog in a wonderful interview.  Lots of photos and information, I hope you'll take a look!


Wednesday, July 3, 2013

New Fabrics by Gaila Designs

I am excited to be creating fabric!  My first offering is a Citrus theme, primarily because it was appropriate for an upcoming contest at Spoonflower.com who prints the yardage on demand.  These are the first fabrics:


 Then I ordered swatches to see the print on cotton fabric, crisp and clear printout!  I left my hand in the photo to see the scale of the prints.  The colors are a bit brighter than they appear in this photo.

What can you make with these fabrics?  How about a baby's room:
What would you sew with fun citrus prints?!?  Find these 'first fruits' of my designs at http://www.spoonflower.com/profiles/gailadesigns